
How to Make Candles at Home: A Maker's 7-Step Guide (2026)
Every step I take in the Bristol studio when I pour a fresh batch of soy container candles, from melting wax to lighting the first burn. Metric quantities, a real shopping list, and the mistakes I made so you don't have to.
Prices updated June 26, 2026
Candle making looks fiddly from the outside and surprisingly orderly from the inside. Once you have melted, poured and cured one batch, the whole process collapses into seven steps that you repeat for the rest of your life.
This is how I make a beginner batch in the Bristol studio: three 200 ml glass containers, soy wax, one fragrance oil, one wick size. Six candles, about ninety minutes of active work, and a two-week wait before they smell their best. Everything below uses metric first because every digital scale on Amazon defaults to grams.
What you actually need
Buy this once and you can pour for a year. Total kit cost in the UK is around $70 before wax and fragrance.
- Soy container wax, 1 kg to start (Golden Brands 464 in the US, KeraSoy 4130 in the UK and EU; the two are not interchangeable, 4130 pours around 60–70°C and wants a CL or TB wick).
- Three 200 ml straight-sided glass jars with a 70 mm internal diameter.
- CD-10 wicks, pre-tabbed, three of them. (We'll size up or down after the test burn.)
- A 1.2 L stainless steel pouring jug. Not a saucepan. The spout matters.
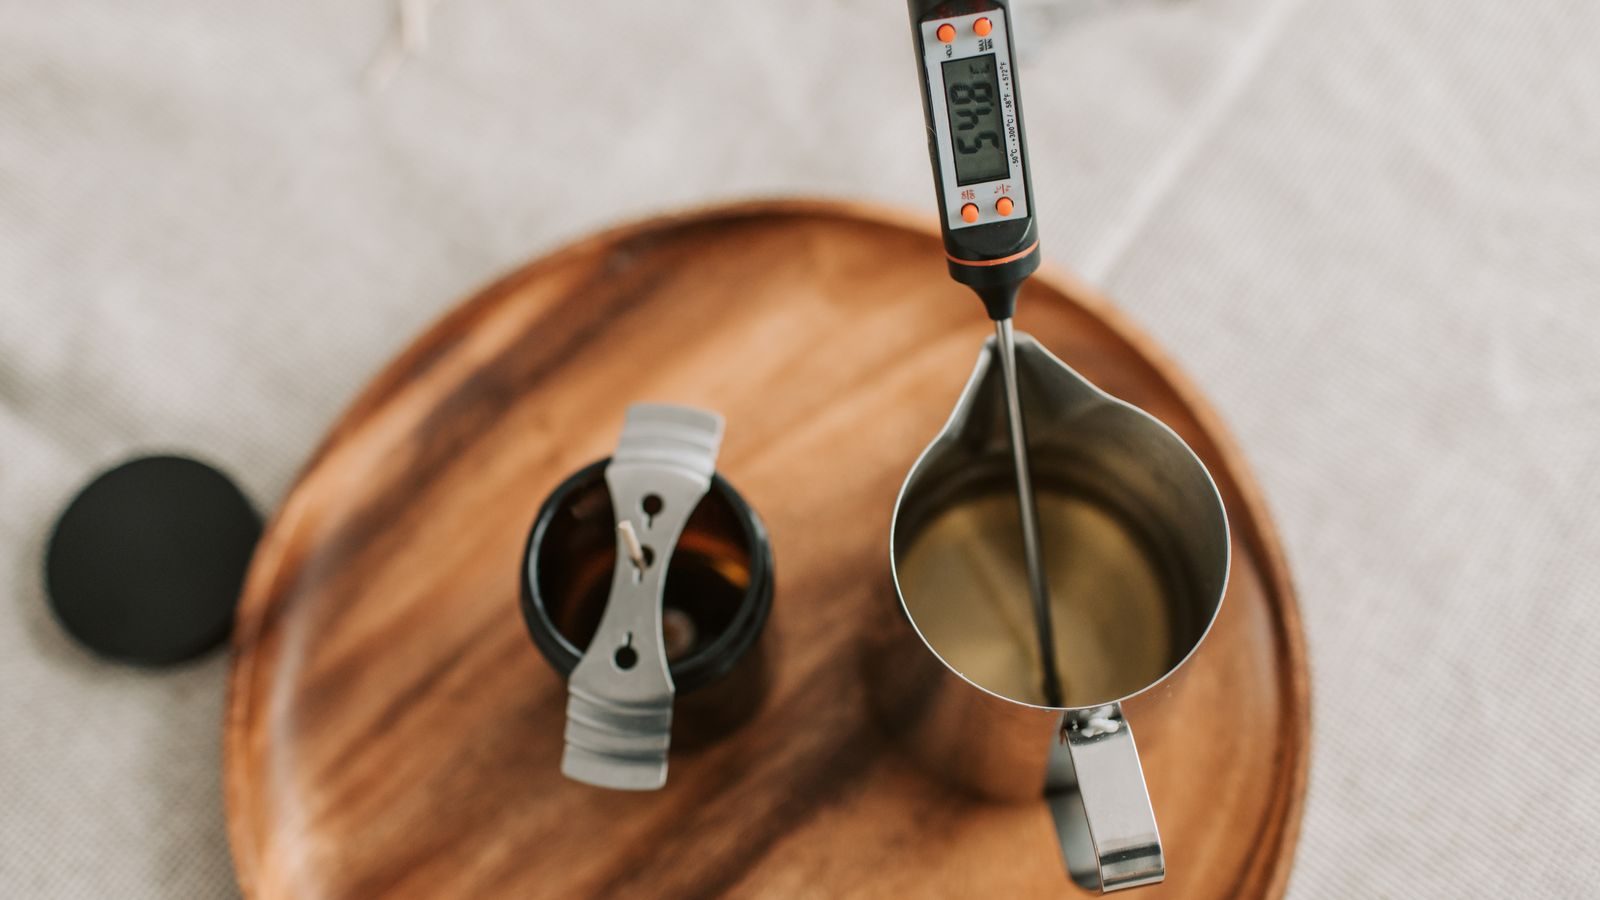
- A digital probe thermometer that reads to 0.1°C.
- A digital scale, 0.1 g resolution, 2 kg capacity.
- One fragrance oil, 100 ml, with an IFRA 51 certificate from the supplier.
- Wick stickers and three wick bars (the metal bridges that hold the wick straight).
- A saucepan big enough to sit the pouring jug in, plus 5 cm of water around it.
Avoid the temptation to start with five fragrances and two wax types. One variable at a time is the only way to learn what each thing does.
Step 1: Weigh everything first
Set the empty pouring jug on the scale, tare to zero, and pour 600 g of soy flakes. That is enough wax to fill three 200 ml jars to about 80% with a small margin for a second top-up pour.
Then weigh your fragrance oil into a separate small jug. For soy at 8% load, that is 48 g of FO for 600 g of wax. Write the number on the jar's masking-tape label. You will need it again at step five.
Step 2: Stick the wicks in, dead centre
Peel a wick sticker, press it to the metal tab of the wick, then press the wick to the dead centre of each jar's base. Off-centre by even 3 mm and your candle will tunnel down one side. Use a wick bar across the top of each jar to hold the wick upright while the wax sets.
Step 3: Melt to 80°C
Sit the pouring jug in 5 cm of simmering water (a water bath, sometimes called a bain-marie). Never melt wax over a direct flame. Soy ignites at 220°C and a dry pan can climb past that fast.
Stir gently every minute or so. When the wax reads 80°C on the probe thermometer, take the jug off the heat. You want every flake melted with no cloudy patches.
Step 4: Cool to your fragrance-add temperature
Let the wax cool to 75°C. Most fragrance oils flash above 65°C, so adding above 80°C burns off the top notes; adding below 65°C means the oil won't dissolve evenly and will pool at the bottom of the candle.
Step 5: Add fragrance and stir for two full minutes
Pour the pre-weighed fragrance oil into the wax in a thin stream. Stir gently, in one direction, for a clock-counted two minutes. Skipping this is the single biggest reason home candles smell weak: the fragrance has not actually bonded to the wax.
Step 6: Pour at 60°C
Let the fragranced wax cool to 60°C for GB-464, or 65°C for KeraSoy 4130. Each wax has its own sweet spot for smooth tops on a room-temperature jar. Pour in one steady stream down the side of the glass, not onto the wick. Stop at 80% jar height.
Leave the jars on the bench, untouched, for 24 hours. If the tops set with a small dip around the wick (very common with soy), remelt the leftover wax to 65°C and pour a thin top-up layer to level them off.
Step 7: Cure for 14 days, then burn
This is the step every first-time maker hates. Soy and coconut waxes need 10 to 14 days for the fragrance molecules to bind into the wax matrix. A candle lit on day one will throw weakly and you will blame the fragrance oil. The fragrance is fine. The wax is not ready.
When you do light it, burn for at least two hours on the first lighting so the melt pool reaches the edge of the jar. Tunnelling is set on the first burn and is permanent after.
First-batch troubleshooting
Almost every cosmetic problem in a first batch comes from one of three things: the jar was too cold, the pour was too cool, or the wick was off-centre. Before you change wax brands, run the batch again with warm jars (preheated to 35°C in the oven for 10 minutes) and a 60°C pour. The improvement is dramatic.
If the hot throw still disappoints after a 14-day cure, the wick is too small for the vessel. Move up one size and re-test. Throw is a wick problem far more often than it is a fragrance problem.
Reference: soy container candles by jar size
Quick lookup for the three most common starter jar sizes. Pour temperature is the wax-into-jar temperature, not the melt temperature.
| Jar size | Wax per jar | FO at 8% | Suggested wick (soy 464) | Pour temp |
|---|---|---|---|---|
| 150 ml | 130 g | 10 g | CD-8 | 60°C |
| 200 ml | 175 g | 14 g | CD-10 | 60°C |
| 250 ml | 220 g | 18 g | CD-12 | 60°C |
| 300 ml | 265 g | 21 g | CD-14 | 60°C |
What to do next
Run the batch. Take notes. Then use the Candle Wax Calculator below to scale the same recipe to your chosen jar size, and the Wick Size Chart to confirm the CD recommendation for your wax and diameter.
Frequently asked
Updated 2026-06-15. Fact-checked against BS EN 15493:2019 — Candles. Specification for fire safety.
The Maker's Codex, as a PDF
The full five-act manual. Bench setup, wick sizing, scent throw, pricing, compliance, scaling. Cited to EN 15493, ASTM, IFRA and CLP. We email your regional edition (metric or imperial, GBP, EUR, USD, CAD, AUD).
Best Wax for Candles: An Honest Maker's Guide (2026)
I've poured every common candle wax through the Bristol studio. Here's what soy, coconut, paraffin, beeswax, apricot and rapeseed actually feel like to work with, and which one fits the candle you want to sell.
How to Start a Candle Business: A Realistic 90-Day Plan
A working chandler's 90-day plan to go from first pour to first paid order. Kit budget, first 10 SKUs, batch costing, channel choice, and the compliance checklist that keeps you out of trouble.
Beeswax vs Soy Candles: A Real Comparison
Burn time, scent throw, environmental impact, and cost compared honestly. The right answer depends on what you're optimizing for.
How to Fix Candle Tunneling (and Stop It Coming Back)
Tunneling is a wick-and-first-burn problem, not a wax problem. Three rescue methods that work, plus the upstream fix so the next pour burns edge to edge.